Tuesday, October 28, 2025
Home Blog Page 2

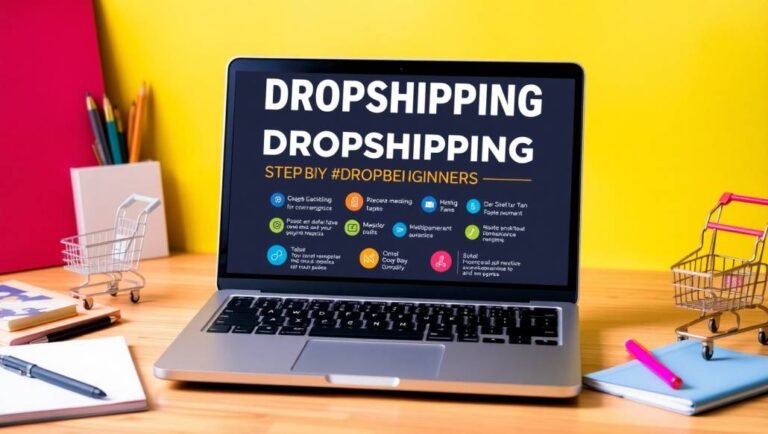
DROPSHIPPING FOR BEGINNERS IN 2025 (Step By Step)

0

Introduction to the Blueprint

So, guys, the blueprint you can see on the screen is what I wish I had when I first started Shopify DROPSHIPPING, because it would have made the whole process a lot smoother, and I would have been able to avoid certain mistakes. So, I thought, ‘You know what? In today’s video, I’m going to go through each different element so that any beginner out there can get a full understanding of the things I wish I knew earlier on.’ And I do need to say that this video shouldn’t be taken as financial or business advice. All I’m going to be doing is sharing my own opinion, my own experiences as to what I’ve been able to learn when it comes to building up a Shopify drop shipping business from scratch.

Step 1: Finding Winning Products with AutoDS

So, let’s jump straight into it with one of the first elements, which is knowing exactly where to find the best winning products to sell. And one of the ways that you can do that, and it’s something that, again, I wish I knew a lot sooner, is to go directly to AutoDS. Now, AutoDS, for those of you out there that’s never heard of it, is a platform that is connected to multiple different drop shipping suppliers. And because of that, they’ve got so much data when it comes to which product is performing well. And in addition to that, AutoDS is the platform that I use and thousands of other drop shippers all around the world use when it comes to being able to automate their fulfillment. But I’m going to speak about that a little bit later on.

So, when it comes to finding the best product to sell or getting an idea of which products are selling well, what you need to do is go over to AutoDS. The good thing about them is that they offer a 30-day trial so that you can test it out, see if it’s something that you want to continue using past the 30 days. So, what I tend to do is sign up using my Gmail account. So, I’m just going to do that right here. And once you’ve created your account, this is a similar page to what you’re going to see.

Navigating AutoDS: Marketplace, Handpicked Products, and Ad Spy

Now, I’m just going to quickly explain it for anyone who’s new to AutoDS and has never seen the interface before. So, first things first, you’re going to come across their marketplace. And this is a page that has all of these different winning products that are selling. Well, these winning products are taken from all of the different people who are currently using the AutoDS software right now. But when it comes to this section over here, which is handpicked products, these are specific products that AutoDS has picked themselves, and they believe that they are going to perform well over the next month, 2 months, maybe 3 months.

They’ve also got this section over here called Ad Spy, where you’re going to be able to spy on ads that people are running on Facebook, Instagram, and TikTok. So, this is a great feature to use when it comes to knowing which short form videos are currently performing well because you can see the ads, you can see the views, you can see the comments, and you can see the shares.

DROPSHIPPING FOR BEGINNERS

Trending Products and Supplier Integration

And finally, when it comes to finding a winning product with AutoDS, they’ve got this trending products page, where again, you’re going to be able to go onto it. You’re going to be able to select whatever niche you want to focus on. So, let’s say if I wanted to build a Shopify store centered around sports and fitness products, I may want to click into this category right here. And literally from this point, I’m going to be able to scroll through and see all of these different trending products that are performing well within the sports and fitness niche.

So, for example, there’s this product over here that I’m going to click into and take a closer look at. As you guys can see right here, AutoDS can show me the estimated general sales when it comes to how this product has performed over the past few months. So, all of this is helpful when it comes to getting an idea of which product I may want to sell, which one I might want to move forward with.

And just going back over to the blueprint, once you’ve got an idea of whatever product that you want to sell, AutoDS is good because, again, it’s connected directly to various suppliers. I recommend that when testing out a product to use a platform or a supplier website like AliExpress. The reason is that it’s a lot simpler to use. You know, you’re going to be able to create your AutoDS account. From there, you’re going to be able to instantly go back onto it, find a product that is available on AliExpress, where they also offer really quick shipping. And of course, you don’t have to use AliExpress. You know, there are countless different suppliers out there that you can choose from. You know, we’ve got Alibaba when it comes to finding a private supplier. You can use CJ Drop Shipping, or you can even use a local supplier in your own country. It’s completely down to you.

Step 2: Competitor Research with Zeke Analytics

But once you’ve decided on a particular product that you’re going to sell, you also know where you’re going to fulfill that item from. The next part of this blueprint is to see if there’s someone else selling that item. And the way that you can do that is by using a tool called Zeke Analytics. Now, I’ve been using Zeke Analytics for many, many years, and I mainly use it when it comes to checking if there are other people selling a product that I’m thinking about selling, and also getting an idea of their estimated sales. Because if you’re able to see someone selling a particular product, and you’re also able to see that they’re successful in doing so, then this is going to make things a lot more realistic. It’s going to allow you to know maybe how to structure your store, how to do things so that you can also be successful yourself.

That’s one of the earliest online business lessons that I learned while I was building things up. If you’re able to replicate what’s working, replicate a proven blueprint. It’s just going to make things a lot more simplistic. So, the way that you can figure out if someone is selling a product that you found on AutoDS using Zeke Analytics is to sign up for a 7-day trial. That’s the good thing about all of these different tools in the times that we’re living in is that you don’t need to commit to anything from the very beginning. You’re going to be able to sign up for trials, test them out, and see exactly how they work.

Using Zeke Analytics: Product Explorer and Sales Data

So, as you can see, I’ve just logged into my Zeke Analytics account, and what I’m going to do is come over here to the product explorer. The product that I’m using as an example right now is this one over here, which is a knee brace. So, what I’m going to do is just type in knee brace, just like this. Make sure that I am only shown drop shipping stores. And I can set all of these other filters, but for now, I’m going to leave it as it is. And I’m just going to click on search.

Okay, perfect. So, as you guys can see, there are all of these different knee braces that have popped up, very similar ones to the one that we were able to find on AutoDS. And just to kind of give you a general overview of how Zeke Analytics works. It’s going to be able to show you when the product was first listed. It’s also going to be able to show you the price of the product, the estimated sales in the last week, the last month, and just generally in total. So, all of this information is useful when it comes to making a calculated decision.

DROPSHIPPING FOR BEGINNERS

Now, if I just click into this one over here, I’m just going to go over to the website. Okay, so this is the product right here. This is what the site looks like. Again, I’m going to be able to know exactly how much they’re selling the product for, how they structured their store, so on and so forth. But using this information again, it just makes things a lot easier and gives you the conviction to know that things are working, people are buying the product, so you could potentially sell it yourself.

And you can also take it a step further. Click into the back end of the store just like this to get a general picture of all of the other products that they’re selling, which ones are their best performing products, you know, what’s their estimated sales throughout the entire store. Just some other information when it comes to being able to expand things, being able to add new products that, again, you know are performing well.

Step 3: Branding Your Shopify Store

But just going back over to the blueprint, once you’ve spied on your competition, you know exactly how they’re doing things. The next step is to come up with a branding plan. One thing that you need to understand about building a Shopify store is that you don’t want to just have a generic store with a whole bunch of different items. You want to make sure that you’re focused on a specific niche. You want to make sure that you’ve got an idea of what your store is going to be about. You know, what products you’re going to specialize in, you know, what you’re going to call your store.

The mistake that so many people make is that they want to get into Shopify drop shipping, but they haven’t truly thought about the business that they’re going to build. My recommendation is not to see this as some sort of gimmick. You know, don’t see it as some sort of get-rich-quick online side hustle that you’re going to do. You need to have a long-term mindset when it comes to the plan of the business, how you’re going to do things, and just generally what is going to be involved. So, this is a crucial part of the process. So, I thought I’d include it.

And I’ve got a more detailed video coming out real soon, when it comes to a lot of the important things that you need to know when it comes to branding a Shopify store. So, be sure to subscribe, hit the bell notification so that you don’t miss that video.

Step 4: Building Your Shopify Store with AI Tools

But moving on to one of the next parts of the process, which is to, of course, start the process of building your store. As you guys already know, when it comes to building a Shopify store, this is the tool that I use because it just makes everything super easy. Of course, there’s going to be some work that’s going to go on your part. But if we compare this to building a Shopify store from scratch yourself, there’s going to be a lot of coding involved. There’s going to be a lot of, you know, optimization involved. You’re going to have to make sure that it’s working for both desktop, mobile phone, and tablet.

However, when using this AI store builder, none of that is going to be necessary. You’re going to be able to go onto it just like this. Click on Build My Free Store. It’s going to take you through a couple of different questions. You know, what type of store do you want to build? You know, you’ve got multiple different options. Weather, home, electronics, sport, and fitness. This is the one that I’m going to select. It’s then going to ask you what images you want to be on the homepage. Don’t worry about all of this. You know, you can change it later on. It’s just about giving you that basic foundational structure.

There are going to be some other things that are going to be involved. For example, you’re going to have to sign up for a Shopify trial. And at the time I recorded this video, Shopify was offering a free month trial, which is helpful because you don’t have to spend too much money when it comes to being able to do all of this. There are countless different online businesses out there. You know, some of them require so much money when it comes to doing it, and it could be somewhat of a headache. However, with this one, Shopify has made it a little bit easier for beginners because you don’t need to pay anything. Well, you only need to pay $1 per month for the next three months.

And this is something that I wish I had back when I was getting started with all of this, because I didn’t have a big budget. So, this would have been helpful. So, that’s the reason why I’m letting you guys know about it. So, you’re just going to have to go through that, activate the Shopify trial, and at the end of it, you’re going to see that you’ve now got access to a fully built Shopify store.

Reviewing the AI-Built Store

So, this is the store that it was able to build for me. As you can see right here, you know, everything has already been structured. You know, all of the different pages, all of the different elements on the homepage. We’ve got the product page over here. If I just click into it, as you can see, these are all of the different items that have been loaded onto the store.

So, if you’re someone who didn’t know what products you want to sell, you could just go over to the AI store builder, and it’s going to be able to add winning, proven products automatically to your store that you can start selling straight away. And of course, if you wanted to use AutoDS when it comes to listing any additional products, that’s not difficult to do as well.

You can go onto any product on AutoDS, click on import draft, and within, you know, maybe a couple of minutes, you’re going to have to make some adjustments to it. Maybe update the title. All of the information is going to be pulled directly from the supplier’s page. But with the help of AutoDS, you can add multiple different products all at the same time that are going to be formatted and structured when it comes to the product pages.

But that’s basically what goes into building a Shopify store from scratch.

Step 5: Setting Up Email Marketing with Omnisend

But once I’ve got my store up and running, the next thing that I do, and one of the next elements in this blueprint, is to set up your email marketing. Now, a lot of people don’t understand the importance of email marketing, but I found it to be super important, especially when it comes to doing e-commerce and building up a drop shipping store, because not every single customer that lands on your store is going to buy straight away.

That’s why you need to have certain things in place on your homepage, on your product pages, so that for every single visitor that you get, you’re going to be able to capture their email, add them into an email automation workflow, and hopefully turn them into a paying customer down the line.

One of my favorite email marketing tools that I use is Omnisend. Now, Omnisend is great for so many different reasons. You know, you can use it with WordPress, you can use it when it comes to building up a blog website, and you can also use it when it comes to building up a Shopify store, too. You’re going to be able to sign up for a trial by clicking on this link over here that says start now.

The process of getting set up isn’t really difficult. As long as you’re logged in to your Shopify store within the same browser, it’s going to be able to take you through the integration process when it comes to making sure that everything is synced up as it should be. So, literally from this point, all I need to do is just click on install. Then click on install once again. And from there, your store should now be connected.

Creating Email Capture Forms and Automations

Now, one of the initial things I always do with Omnisend is to make sure that I’ve got some sort of capture form in place on my site so that again, I’m going to be able to build up an email list in the back end that I’m going to be able to automate emails, promote products, and just let people know about the brand that I’m building.

So, the way in which that works is you’re just going to come over here to the forms. From this point, it’s going to show you all of these different templates that you can choose from. And just to keep it simple for today’s video, what I’m going to do is click on Use template for this one. The good thing about Omnisand is that you can, you know, customize it in whatever way that you want. If you want to add an image, your logo, to the popup, you can do that. But for now, I’m just going to leave it as it is.

The one that I like to use most of the time is asking the person if they would like to save 10% on their order. Of course, most people are going to say yes because who doesn’t like a discount? And when they click on yes, it’s then going to take them over to this page, where it’s going to ask them to enter their email address. And if I also wanted to edit the thank you page, I’m going to be able to do that right here as well.

So, Omnisend is powerful because this is the pop-up that’s going to appear on my site. Once I click on enable form, that’s when it’s going to be active, ready for people to start inserting their emails. But in addition to that, if I also wanted to do some sort of AB testing where I use certain language on one popup and maybe on another one, I use a different type of language, I could just click on AB testing, as you guys can see.

And half the time, I’m going to have one version showing, and then the other 50% it’s going to have a different one. And from there, I can now gauge which one can capture more emails. So that, of course, I can put the more successful one full-time so that it’s going to be able to work for me in the background, allowing me to build up a successful email list.

And of course, from that point, you’re now going to be able to set up an email automation with the help of Omnisend so that emails are going to be sent out automatically. You’re going to reschedule them, and they’re going to be sent out without you having to manually do it. But again, I’ve got more videos coming out about Omnisend and how to build up a successful email marketing campaign. So, make sure that you subscribe so that you don’t miss that video.

Step 6: Leveraging SEO with Google Search Console

But let’s move back to the blueprint. Once you’ve set up your email marketing with the help of Omnisend, the next thing that I would advise that you do, which I do myself, is to connect your newly built website to a Google Search Console account. Now, this is something that I speak about on this channel quite often because a lot of people on the internet don’t talk about it, but I found it to be a powerful way of being able to, you know, get organic traffic onto your site and also be able to capitalize from SEO, which is search engine optimization.

All this means is making sure that you’re putting the right keywords within your Shopify store on the product page on the homepage that relate to your niche so that Google is going to number one knows that your website exists and number two they’re going to be able to show it to the right person. This is going to come in the format of also making sure that you’re publishing blog articles on the back end of your Shopify store as well.

Most people don’t realize this, but if I just go back over to my Shopify account, I’m going to come on the left-hand side over here and click on content, and then I’m going to click on blog post. What you’re able to do with Shopify is publish blog articles every day, maybe three times a week, that are going to get ranked in Google because you’ve connected your Shopify store to a Google Search Console account. And what this means is that you’re putting yourself in a position of being able to get organic traffic, traffic that you don’t need to pay for coming onto your website consistently.

Automating Blog Content with Make.com and AI

So that’s the reason why I recommend signing up for a Google Search Console account. Now, there’s one way that I found that you can actually automate the process when it comes to publishing blog articles, and that’s going to be with the help of make.com. So make.com is another powerful platform because the way that it works is that you’re going to essentially use it when it comes to integrating various different AI tools. So those AI tools are going to perform a specific task. And in this case, the task is going to be publishing blog articles and automatically posting them to a Shopify store.

Let me show you exactly how this works. Right? So if I just log into my make.com account, as you can see, this is a sequence that I set up. And this sequence is me telling make.com to monitor a specific Google sheet.

This Google sheet is going to have all of the different blog title articles, you know, the SEO keywords, and the specific product that I want to promote within the article. From there, I’ve connected that to Open AI so that Open AI can tell Chat GPT to automatically produce an article based on the information in that spreadsheet. And then from there, OpenAI is connected to the Shopify store. All done through API so that everything is automatically posted.

I’m not saying that this is completely easy to set up, but it’s something that I’m doing. So that’s the reason why I’m sharing it with you guys. So that’s basically how you can automate the blog posting so that you can get SEO traffic onto your site.

Step 7: Running Paid Ads (Facebook & Google Shopping)

But a little bit more on that later on. Let’s move on to one of the next things in this element, which is how to run paid ads. So, there’s a plethora of different ways that you can use when it comes to paying for advertising on your site. And there are various pros and cons that go with organic traffic and paid traffic.

Now, the two platforms that can allow you to scale are Facebook ads or Google Shopping. Of course, we’ve got things like Snapchat ads, TikTok ads, and Instagram, but I would say that these are two of the main ones. Google Shopping ads are perfect when it comes to targeting specific search terms that people are going onto Google and searching for. And Facebook ads are more popular when it comes to selling a product that people don’t necessarily know that they want. But as long as you’re able to target people’s interests, you’re going to be able to show them a product that they are most likely going to spontaneously buy.

So, these are the key things that go into running paid ads. Now, of course, just like with anything else in life, there’s going to be a lot more details that go into it, but I’ll recommend that if you’re a complete beginner, to study these two different platforms. Get a firm understanding of how they work, and also get a detailed understanding of how to set up your ads as well as optimize them.

Optimization is super important when it comes to running any sort of paid ads because if you’re not doing that, you’re essentially losing money on your daily budget. But I would say for the most part, these are the key things that you need to know.

Step 8: Order Fulfillment and Automation with AutoDS

These are the key things that go into setting up a Shopify store. But generally speaking, when it comes to the drop shipping business model, of course, the way that it works is that you receive money from the customers, and then from there, you’re now going to go over to your supplier, buy the product from them so that your supplier can ship it out without you ever having to see any inventory.

So everything essentially loops back into AutoDS because again, this is the platform and software that you’re going to use when it comes to setting up automation, so that you don’t have to bring out your credit card every single time to buy an item. The way that things work manually is that when a new order comes in, if you weren’t to use AutoDS, new order comes in, number one, you would need to remember which supplier you purchase from. Number two, you would also need to remember all the customer’s details. You can copy and paste it over, but it can get a little bit confusing. Then you may want to do this initially if you’re a beginner.

But if you want to be able to take things just a little bit more seriously, then AutoDS is the tool that you may want to consider using. It’s a tool that I use.

Final Thoughts and Call to Action

But again, guys, these are the main things that go into this blueprint when building up a Shopify drop shipping store. Things that I wish I knew from the very beginning. I’ve got many more videos coming out over the next few weeks, over the next couple of days, even when it comes to, you know, the fine details that go into this.

Just make sure that you like this video if you like this type of content. Don’t forget to subscribe, hit the bell notification so that YouTube can let you know once a new video has been released. And if you also wanted to watch a recent YouTube video that I made, not too long ago, where I break down some key things that go into being able to automate the blogging side of things, so that you can capitalize on organic SEO traffic. Just click the link right there. Watch that straight after this.

That video’s already helped out so many people. I get messages all the time from people who have been able to learn from it. So, I’m sure if you’re able to stick through it from the very beginning up until the very end, it can also help you out as well. But other than that, guys, I’ll catch you on that next video. Make sure you stay safe out there. Ace.

How To Make Money Using Google Maps In 2025 ($100-$200 PER DAY)

Introduction

most people use Google Maps to find a restaurant or get directions but what if I told you it could be the way that could help you make $100 to $200 per day online there’s actually a simple strategy using Google Maps that anyone can start and you don’t need any prior marketing experience or any crazy tech skills or some large upfront investment and I’m using this exact strategy to make a really nice consistent income every single day online

Why This Strategy Works

and the best part is this isn’t some complicated online business model in fact this is the same exact business model I’ve shown hundreds of others who’ve been able to duplicate this exact business that I want to show you and be able to start earning their first dollars online

No Course or Coaching Required

and before you think I’m just making this video to sell you some course or high ticket coaching program I have none of that in fact I’ll actually give you my full step-by-step course plus all the templates and scripts and a free live boot camp all 100% for free all I ask in return is just smash the like button drop a comment down below so I can share with you the private link to unlock all that for free and then consider sharing this video with a friend who might also find this video valuable

A Real Alternative to Gimmicky Side Hustles

so if you’re tired of all these side hustles they’re all overpromising and underdelivering this could be the business that you have finally been looking for and all I ask in return to get everything that I offer 100% for free is to just smash the like button and drop a comment down below so I can share with you that private link to get access to everything without any hidden upsells or any paywalls

Leveraging Pre-Built Software

so now that you’ve smashed the like button dropped a comment down below so you can get that extended 30-day free trial plus that live boot camp to get everything set up what we want to do is leverage this pre-built software to sell a simple service that requires no to minimal ongoing support so that we can make monthly recurring revenue in a pretty semi-passive way

A Simple Service That Works

now a simple service that I know works very well is helping small local businesses with their marketing so they can get more clients and ultimately make more money and this one service that I want to show you how to set up takes about five minutes to set up it’s a one-time setup but continues to add value to this small local business owner so they’ll want to continue to pay you on a monthly ongoing basis

Monthly Recurring Revenue with One-Time Setup

but because it was just a one-time setup every single month they are paying you for access to this software that you set up once but don’t have to really do any ongoing fulfillment so this is a pretty semi-passive income business model

Finding Your First Clients

so let me just pull this up on my computer really quick so you can see how to get your first clients how to set up these clients and run this entire business and have everything set up in less than a day for $0

Google Search for Leads

and as you’re watching this and if you like this business model and you think of a friend that you’d love to do this business with just tap the share button send this video over to them so you guys can both get started on this and working together 100% for free

Prospecting Local Businesses

so the first thing that we’re going to do here is we’re going to come over here to Google to find any type of local business owner this could be a plumber electrician a roofer real estate agent it really doesn’t matter

Understanding the Google Search Results

so for this one we’re just going to type in a plumber in Denver Colorado and it can be any location it really doesn’t matter and what happens here is the first results are usually paid results so you can see the sponsored up here so they’re paying to be at the very top of this Google search term then if we scroll down we see more businesses

Why Reviews Matter

so if somebody’s needing a plumber in the Denver area obviously they’re going to go to Google they’re going to type in plumber in whatever area they’re in and they’re going to start calling these different listings and typically the listings that show up at the top they’re the ones that have the most Google reviews and the most fivestar reviews

Unique Service Offer: AI-Powered Booking

so you see this one right here over 7,000 reviews they’ve done a lot of serious work to get a lot of reviews to show up at the very top of Google all right now what we’re going to be offering with this one simple five-minute setup to these small businesses is something I guarantee you none of these small businesses have ever been pitched before

The Offer They Can’t Refuse

because this service leverages AI and it is very cutting edge technology so it’s not like selling them reviews or Facebook ads or SEO to go through and rank their their website higher in Google

Crafting the Pitch

and so what we’re going to do is we’re going to have this long list we can even click on more businesses we’re going to have this long list of all these businesses that we can go through and reach out to and what we’re going to say to them is simply I will get you as many appointments as you want in 7 days with zero ad spend or you pay nothing are you interested

Why This Works

and let me tell you something after working with over 15,000 small local business owners the one thing that all these small businesses want are more appointments so they can get more customers

Dealing with Skepticism

and ideally if they can get more appointments so they can get more customers with zero ad spend with zero risk because they don’t have to pay anything if you don’t get them result they are going to be about that all day long

Automating With AI Bots

so you’re going to get a lot of people going through and saying yes to this which stick around with me here in a second because you might be looking well if they don’t pay anything how am I actually making money i will show you that here in just a second

Setting Up Conversation AI

so once you get one of these small business owners saying yes which with an offer like that I guarantee you’re going to have a lot of these small business owners saying yes to that you’re going to come over here to a simple software and what we’re doing here is we’re going to come down to settings and we are going to set them up with something called conversation AI

How the AI Helps

so small businesses they have a lot of people reaching out to them facebook Messenger Instagram DMs a live chat on their website text messaging there’s a lot of ways to go through and communicate with these businesses

Why Automation is Essential

however a plumber a massage therapist a chiropractor they don’t have the time to respond to all of these messages and a lot of times if they have an assistant or secretary the assistant or secretary is also busy doing a number of other tasks

Building the Bot in Minutes

so what we’re going to do is we’re going to set up a simple AI bot to be able to automatically respond to all these clients to save them a ton of time a ton of money and book more appointments on their calendar with zero additional ad spend

Step-by-Step Setup

all right so in order to set this up like I said this has to be beginner friendly no marketing experience i want to be able to have my grandma or my 10-year-old nephew be able to set this up

Training the AI

we just come over here and we would just click on autopilot you can see it’s already clicked right there we choose which supported channels we want to go through and leverage and you can see I’ve already got Instagram Facebook Messenger SMS a chat widget or live chat all selected

How to Make Money on Instagram as a Content Creator

You Don’t Need 100K Followers

You think you need 100,000 followers to make real Make Money on Instagram? Think again. I’ve made 10s of 1000s and I started with barely 100 followers. Many people waste months chasing likes, but if you know which tools to use, you can start earning immediately. My name is David, and in partnership with Intuit, I’m revealing seven apps that will flip your Instagram into a money machine, no matter your follower count. Let’s get into it.

App 1: CapCut for Viral Reels

If you’re not making reels, then I’m sorry you’re falling behind. They are the fastest way to grow on Instagram, and CapCut is the editor that will make your reels pop. Here are four features you gotta check out. First, did you know that you could double your engagement on a reel with auto-captions? According to Instagram CEO Adam Mosseri, up to half of the views on Instagram happen with the sound off, so no captions means fewer views.

Make Money on Instagram

If you add those captions, yo, can choose a text template to fit your reel’s look and feel. Second, do you ever wonder how people appear on top of a video? Auto cut out removes the background from any clip,n without a green screen. Third, what about your worst fear? Your video is boring.

You can grab free images and video to spice things up. Add transitions and animations to keep your audience’s attention super high. Now, if you don’t want to go on camera, you can also let AI do the talking. All you need is a compelling script, and voila. I probably shouldn’t share this, but this is how much Kevin Stratford makes on YouTube. No, with everything except auto cut out is free, or you can upgrade for $30 a month.

App 2: Shopify for Seamless Selling

Now that your reels are grabbing some attention, it’s time to turn that attention into income. App number two is Shopify, a simple way to sell physical or digital products and link them directly to your Instagram posts. Now imagine you’re on Instagram and you see something you might want to buy.

The caption says “Lincoln Bio.” Are you going to their bio? No, you’re not. But if you connect Shopify to an Instagram shop, followers can buy without leaving the post. No, we just having an Instagram shop is not enough because it traps you in the Instagram ecosystem. Shopify gives you your site, your traffic, and real control. And it starts at just five bucks a month plus transaction fees.

App 3: QuickBooks Online for Financial Clarity

So you’ve got Shopify’s setup and sales coming in, but are you making money? That brings us to app number three, QuickBooks Online. Many creators forget that income means nothing if expenses eat at all, and QBO tracks every dollar. Your sales subscriptions, transaction fees, and even your taxes, so you know what’s profit and what’s not.

It links to your bank and credit cards, so you no longer need to log sales manually. And while Shopify won’t handle your sales tax, QuickBooks will and helps you stay compliant. If managing money stresses you out, QBO gives you access to tax experts, too. It works in over 170 countries and starts at 1750 a month for the first three months. Use the link in the description to get started.

App 4: Skool for Engaged Communities

Selling products is a great start, rt, but it’s not your only option. What if you could teach a skill and build a high-value community around it? That’s where app number four comes in, Skool. Now, most communities are ghost towns. Why? Zero engagement. Skool turns out to be around with gamified participation.

Members earn points in the Skool forums when others like or reply to their posts. Level up when you get enough points, and at each level, you can earn special unlockables in the community. Do you want to get even more engagement? Run live events directly with your community or create a course. Some creators combine both to boost results. A course plus weekly group coaching sessions. Now Skool is a flat $99 a month with a 14-day free trial.

App 5: Thinkific for Teaching Without the Crowd

So what if you want a course without the community? Does half the price work for y, ou too? Meet app number five, Thinkific. Like Skool, Thinkific has a full course built, but it adds a few key features. You can create quizzes and surveys to check understanding and even use AI to generate the questions.,

Now, learning expert Justin Sung says that cramming kills retention. That’s why Thinkific lets you drip lessons weekly so your students retain what you teach. Skool can drip content too, but Thinkific gives you more scheduling control, and when it’s time to launch your course, you get a built-in page builder to sell your course and book clients. All of this for $49 a month.

App 6: ManyChat for Automated Engagement

You built the course or community. Now here’s the real challenge. How do you get people there? Because your audience is still stuck on Instagram, and if you’re still saying Lincoln bio, then you’re losing sales. App number six is ManyChat, and it’s what top creators use in 2025. All right, here’s the play. Instead of saying Lincoln bio tell your audience to comment a word on your post. ManyChat then DMs them the link of your choice. Zero confusion.

This works by setting up an automation. You set the trigger, add actions, and boom, automated conversion. You can even use this for story replies and send different links per post, and bonus, your account gets a major engagement boost because so many people are commenting, so more people see your content. It’s free for up to a thousand contacts, then $15 a month after that, and worth every penny.

App 7: Canva for Brand Building

You’ve got the traffic. You’ve got the tools. Now it’s time to grow your brand. App number seven is Canva, and it’s for more than just posts. You can make brochures, e-books, sell sheets, and even whiteboards. Everything you need to market like a pro, and if you’re not a designer, you get thousands of templates and a massive library of stock photos, graphics, and videos. Now it’s free to start, but Canva Pro unlocks the full toolkit for $15 a month.

The Final System

But here’s the thing. Top creators combine all of these apps in ways that you don’t even know. For exampl ,let you build a guide in Canva around something you know, then you tease it with a reel you made in CapCu, and in ManyChat, auto DMs the guide every time someone comments.

Then you can monetize it with Shopify or Thinkific or just collect emails to grow your list. That’s not content. That’s a system. That’s scale. That is a business. With these seven apps you’re not just winging it on Instagram anymore. You’re building a machine that sells while you create. Thank you so much for watching. Drop a comment if you want to deep dive into any of these apps, and I’ll see you in the next video.

Amazon Influencer Program COMPLETE Guide (2025) | Start & Make Money

The Amazon Influencer Program: A Lucrative Opportunity

The Amazon influencer program might be the best way to make money online right now, and here’s what I mean. I’ve made 113,000 last month alone, and right now,andrightnowI′maveragingabout110,000 a month. But the cool part is that I’ve been traveling, so I haven’t uploaded a single video in the last three months, so I’m making this money completely passively.

Why This Video Is Essential for You

Now, if you want this program to work for you, this is the most important video for you to watch because I’m going to show you:

  • How to get approved for the program

  • How to make your first few hundred dollars

  • How to eventually scale so you can have numbers just like this, working only a couple of hours a week

Even if you’re a complete beginner, just like how I helped Ken scale from being a complete beginner to making over $3,000 a month within a couple of months of the program—and so many others just like him.

Amazon Influencer Program COMPLETE Guide

Step 1: Getting Approved for the Program

So, the first step here is approval. The Amazon influencer program has two sections for approval, and this first section is what I would call the AI-based section. It is strictly based on engagement on your social media accounts—it can be TikTok, Instagram, YouTube, or Facebook.

Now, that doesn’t mean that you need to have a huge following—I’ve seen people get approved with a few hundred followers. The main metric that they’re going to be looking for is engagement—so how many likes or comments on your photos and things like that.

The good news is you can apply for an unlimited amount of time, so there’s almost no risk in trying.

How to Sign Up

In order to sign up, you can go to the link that’s on the screen right now, or you can just Google “Amazon influencer program” and select the top link right here. Then, once you open the website, you’ll see this, and then you click here to sign up.

Hit “Create an Account” and enter your information. You’ll be taken here where you can link to any one of these four different social media platforms. Then, after logging into one of your social media profiles, you’ll essentially instantly get approved or instantly rejected.

What to Do If You’re Rejected

If you’re approved—awesome! If you’re rejected, no worries, you can reapply. I’ll have more information for you later in the video on how to fix that if you get rejecte,d because there are some specific methods and steps that you can take to get approved that don’t involve trying to grow a large social media audience organically.

Step 2: Getting Approved for On-Site Placement

So once you’re approved, you’ll be taken to a screen just like this, and then you’re into the second step, which is about getting approved for the on-site placement—whic, which is what the Amazon influencer program is all about.

Once you get approved for this step, you’ll be able to post videos directly on Amazon, and they’ll go directly onto the product listings.

Requirements for On-Site Approvals: To do this, you need to upload three videos that meet Amazon’s terms in master quality that Amazon is looking for on their platform. So for this step, you will want to take your time and keep in mind that you need to match all of Amazon’s terms. I’ll leave them linked below so you can go through them more in-depth, but it’s pretty basic stuff—really, it’s just like:

  • Not calling out to click links or asking for follows

  • Not mentioning price

  • Not showing private information like your phone number or address

  • And different things like that

You also need to make sure whoever is the person on the social media profile that you signed up with is the same one in those three videos. That can change after this approval process, but for this section, it needs to be the same person.

Amazon Influencer Program COMPLETE Guide

Amazon’s Quality Standards

Then, Amazon is looking for basic quality standards. I’ll get more into how to make quality videos using your phone in a minute, but the big thing here is:

  • Have a decent mic (which just means that you will want to be close to your camera or your phone when you’re talking, or you can use a wireless mic system, which I’ll show you in a second).

  • The product should be in focus in the center of the frame (ideally).

  • The video should be filmed horizontally.

  • And it should be longer than a minute in length.

Uploading and Waiting for Approval

So after you upload those videos, it’ll say “Processing.” Then, after a waiting period of about 6 to 12 hours, it’ll either say “Published” or “Rejected.”

This doesn’t mean that you’ve been approved for the program—it just means that the AI system didn’t detect any issues, and it’s ready for manual approval.

After uploading those three videos, you’ll have to wait about 2 to 7 days for somebody to manually review the content, and you’ll either be rejected or approved for on-site placement.

What If You Get Rejected?

If you get rejected, don’t freak out—you still have two more attempts, or else you’ll need to reset the program from scratch. So the thing is, do take your time when you’re making these three videos so you can do them right.

If you want to know how to do them right, just stay tuned because I’m going to talk about that.

Step 3: Posting Videos and Earning Passive Income

So now that you’re approved, you’re ready to post. Any video that you upload to the program and passes the AI inspection (meaning it shows “Published”) will go directly on the Amazon listing (barring their algorithm).

Then, if somebody watches that video and buys a product, you’ll get paid, and as long as the product is popular, it can continue to earn you money. So a video that you upload now can end up making you money two, three yearsino the future.

The Importance of Choosing the Right Products

For example, and this is exactly why one of the most important steps is finding the right products to review.

Almost everybody who talks about the influencer program just talks about spamming out content with almost literally any product that they can get their hands on, or they have a selection process that’s really outdated and just not effective.

You’ll see people who have a thousand, 2,000—I’ve heard of people with 10,000 posts. Meanwhile, I’ve uploaded 36 videos so far this year and have made $58,000 (and we’re only partway through August when I’m talking about this).

I’m averaging about 1,000 per video,andI′mabletospendonlyacouplehoursaweekandbringinover100,000—in large part because of this.

Examples of High-Earning Products

So, for example, you can see here—these are individual products that made me 5,000,4,000, $3,000 in a year. These are everyday products that most people have lying around their house. You could be sitting on a goldmine and just not know about it.

So this is just really, really important—almost nobody else really understands this, so pay close attention because this information alone can be the difference between making 50adayand500 a day with this program.

How to Find Winning Products

Now, there’s a little bit to mastering the skill of finding winning products, but to simplify the process for you, just ask yourself these seven questions:

  1. How much monthly sales does this product have?

  2. How much commission is there per sale within that product category?

  3. How much does the product cost?

  4. How much competition is on that product?

  5. Is the product something that people would even watch a review of?

  6. What is the lifespan of that product?

  7. Are the influencer videos allowed on that product page?

Tools to Analyze Product Sales

So, to see monthly sales, you can use a plugin like Viral View or Jungle Scout. These plugins allow you to see monthly sales volumes on products.

I recommend Viral Video because it was designed specifically for the Amazon influencer program, so you can see things like:

  • Commission rates

  • Whether there’s Carousel videos are allowed

  • How many videos are being shown on the listing

  • And different things like that

I’ll leave a link below if you want to sign up for that.

Scanning Your Amazon Order History for Opportunities

You can scan your Amazon order history to find opportunities on things that you’ve ordered in the past—and do the same thing on your family account or your friends’ accounts—and take notes of all the good products that you have access to.

If you don’t want to use these plugins, you can also just choose the best-selling ranking,whicht can help give you a basic idea of how some things are performing.

Understanding Commission Rates

You can find the commission rates directly on Amazon. The commission rates are typically either 2% or 4% for the higher commission products—just keep in mind, you can sell half as much and make the same amount.

Choosing Products People Want to Watch Reviews On

And when you’re thinking about what products to review, you always need to keep in mind: What products do people want to watch reviews on?

And those are typically one-time purchase-type products. So, for example:

  • Coca-Cola might be a best-selling item on Amazon, but nobody’s watching a review on Coke.

  • Meanwhile, on the other hand, if you’re going to buy bed sheets, a mattress, and a new phone—a lot , f people are going to look at reviews on those.

They get more information before they buy that product. So review something like bed sheets or technology—don’t review Coke.

Evaluating Competition

Now, most people tell you not to make videos on products that have a certain level of competition, but that information iy outdated in my opinion.

Almost every product that’s going to be worthwhile is going to have some level of competition, so don’t stress about the number of competitors. Instead, look at the quality of those competitors.

If you’re seeing YouTube-level, high-production-value videos, you probably want to stay away. If you’re seeing low-quality, shaky, bad camera work, bad videos, then that might be a good opportunity.

Considering Product Lifespan

Next, you need to consider the lifespan of a product. If you’re getting into this and you’re hoping to make this a legit side hustle, then the videos need to have longevity.

Otherwise, you’re just going to be jumping on the hamster wheel, chasing that next product to review day after day, week after week—and having to constantly make contenttoo make money.

Example: Longevity vs. Short-Term Gains

So using ,an example of bed sheets—you ca,  have the same bed sheet selling for 5 years. So if you’re making 10perdayforthenext5years, that video might make you about 3,500.

Meanwhile, if you get some Christmas product, that might make you $500 in one month—but th,  next month, you’re making nothing. So the longevity is better than the one-time payment.

Ensuring Videos Show Up on Listings

And the most obvious and important one is just to make sure that the videos that you make are going to show up on the Amazon listing.

You can use Viral View or just check manually. For example, I don’t think Apple allows for influencer videos on Amazon listings, so just double-check before actually making your video.

Step 4: How to Make High-Quality Videos

Okay, so now that you’ve found quality products to review, how do you review them? It’s the same steps to make quality videos to get approved for the program.

There are four main steps to making quality videos:

  1. Film Quality

  2. Audio Quality

  3. Script Quality (what you say)

  4. Thumbnail and Title

Film Quality Tips

For film quality, honestly, you can just use your cell phone—it’ll be completely fine. Just film with natural light, with the light at your back, versus filming into the light, because that will create something called backlighting, and it does not look good.

So here’s an example of what I mean:

  • This is shot on an iPhone 13 Pro Max—looks good.

  • I take one step to the left and turn the camera towards the window, and it looks significantly worse.

You can see these side by side, and it’s a massive difference filmed seconds apart, taken two steps to the left. A simple change makes a huge difference.

Now, if you can’t find anywhere in your house that doesn’t have that backlighting, then just film at night. And just keep in mind—the more depth behind the product, typically, will make the product look better.

Lighting is way more important than having any type of fancy camera.

Recommended Equipment

And the one thing that I recommend for you to pick up to improve your phone quality is a simple tripod just l, just ike this one.

This can go up to about 6 ft in height because it extends very far, but at the same time, it can also just go on a table. Simple thing, but it can significantly boost your film quality.

Audio Quality Tips

To have high-quality audio, again, your phone will work completely fine, just as long as you’re within about 3 ft of your phone.

So if you want to go further than that, you might want to use a lavalier mic. You can get a cheap one just like this or a better one that might be something like this.

The mic quality doesn’t matter as much, though, because you can always run it through something like Adobe Podcast (which is a free AI audio enhancer), which makes your audio sound significantly better.

Scripting Tips

With regards to scripting, the key to making good quality videos is to make sure that you check all of these boxes:

  1. Hook the viewer right away—don’t introduce yourself or start rambling.

  2. Establish some kind of authority—could be the length that you’ve owned the product, could be your experience using the product.

  3. Don’t waste words—so avoid any long pauses or “ums” or “ahs.”

  4. Deliver on what the viewers came to see—so that’s commonly asked questions and other things that viewers would be interested in.

  5. Keep the video length short—ideally about 1 to 2 minutes in length.

Thumbnail and Title Best Practices

Now, with regards to the thumbnails:

  • You want to showcase the product.

  • You can add text if you want, but just as long as the product is displayed.

If you have a product that’s very hard to showcase in an image, and you film yourself, and you want to be in front of the camera—I prefer faceless content because it’s more scalable.

But if you do want to be in front of the camera, that’s up to you. You can always communicate emotions.

Example of Emotional Thumbnails

So, for example, if you had a chair just like this chair, it might be hard to show this chair in a thumbnail. So instead, you might sit there, smile, and do a thumbs up or something, and be inviting.

In this case, you’re invoking the emotion that you want the viewer to have rather than showcasing the product.

It’s best to very clearly showcase the product in the thumbnail, but in those rare events where it’s very hard to showcase the product, you can showcase emotion by using the product and being in front of the camera.

Or if you’re making faceless content, you make sure to still try to do your best to showcase the product and clearly show text that could showcase what the product is and what the video is about.

Crafting Click-Worthy Titles

The title of the video should almost always include:

  • The name of the product

  • Some kind of clickbait

So, for example:

  • “Is this chair any good?”

  • Or “Should you buy this chair?”

And then just replace the word “chair” with the name of the actual product.

Step 5: Scaling Your Amazon Influencer Business

Okay, so at this point:

  • You found good products.

  • You know how to make quality videos.

So the next step is to make content with the products that you readily have available to you—starting with the products that you currently own yourself, and then work on your immediate family members, and then close friends, and so on and so on.

That will get you to about 1K to 2 K per month.

But if you want to grow so that you could be making 3Kto10K3 K to 10 th without constantly having to make new content all the time, then you need to know about scaling.

How I Scale Without Filming Myself

Now, this is something that I love because:

  • I don’t film my videos anymore.

  • I don’t do my voiceover.

  • I don’t edit my videos anymore.

All I do is:

  • Find the right products to review.

  • Lay out the structure.

  • And then the videos are essentially made for me.

And then I get paid.

And this is a big, big part of how I’m able to make 1,000pervideowheremostpeoplearemakingsomethinglike20 per video.

Steps to Scaling

So this is how you do this:

  1. Master the steps I’ve mentioned—you want to make sure that you’re getting the most out of every product that you have. This might take some time and practice.

  2. Use Creator Connections—Brands not only will give you free products for you to review, but they’ll also give you bonus commissions to make content on their products. And this can be an insane difference—I’m talking about going from 2% to 20% commissions. I’ve seen 50% commission rates.

  3. Get approached by brands—After you start making content and it’s quality, brands will start to reach out to you for you to review their products. But only take on products that you want or can easily sell after using them. Or better yet, you can charge these brands up front to make videos if they want them—that’s an easy additional revenue stream for you.

  4. Buy products strategically—Buy things on Amazon or other platforms only when you’re very comfortable with your content quality and the performance of your videos. And don’t buy these products new—try to buy them used to save money.

  5. Outsource tasks—You can hire somebody to help you film or hire somebody to help you edit, so you can only work a couple of hours per week. But that is a bit more advanced, so if you want some help with that, then just check out the information in the description.

Avoiding Common Mistakes

Now, a lot of the people you’ll see making videos showing the results on the Amazon influencer program don’t mention the fact that most of the money they made went into buying those products.

And this is exactly why I use the strategy that I use—because I can turn huge profits per product. So the revenue numbers that you see are very close to the profit numbers.

Why You Shouldn’t Buy & Return Products

Now, people are going to think: “Why don’t you just buy and return products?”

You don’t want to do that because, ultimately, you can get your account banned if you do that.

You obviously could buy products at different retailers and try to return things there and ,do that whole type of thing—it can get a little messy when you do all that. But I’ll leave that up to you for your discretion.

If you are buying products directly on Amazon, of course, you can return occasional products, but I really would try to avoid anything more than 10%, especially if you’re doing a lot of volume of videos (which again is just something that I wouldn’t recommend).

That can require a lot of products. It’s much better just to select the right products and then have to make a lot less vifewer—then you don’y have to worry about the whole buying and returning thing anyway.

Final Thoughts & Next Steps

With that being said, there are some other subtle things just l,ike that that ,cly help your performance.

So if you want to:

  • Quickly be able to get approved for the program right now

  • Get help getting approved for the on-site placement

  • Significantly fast-forward your success with the influencer program with a proven system that has worked consistently with me and has helped so many other people as well.

(So you don’t have to struggle to try to figure out everything on your own.)

I can help you with that. If you’re serious and want to get results with this program, then just check out the information in the description.

Conclusion

So overall, I hope that you found this video helpful. I hope that you learned something, and I look forward to seeing your success with the Amazon influencer program.

Read More

Mastering Shopify’s Marketing Tools: A Step-by-Step Guide

Introduction to Shopify’s Marketing Tools

Let me introduce you to Shopify’s marketing tools. This is the perfect formula to get your marketing rolling.

Setting Up Marketing Campaigns

First, let’s head over to the marketing section in your Shopify admin dashboard. Here is where you’ll find your campaigns and automations. A marketing campaign is a structured set of marketing activities to promote your product and services. We see these all over the place on billboards, social media, and TV ads like Nike’s Just Do It campaign from 1988.

So, let’s create a campaign by clicking on campaigns and then creating an activity. You can now see the marketing channels that you have installed on your store. And you can select whichever one you want to use. Once you click on one, it’s going to give you the directions to set it up.

But you’re not limited to these. You can download apps on the Shopify app store that integrate with Shopify marketing. You can see here that we have Shopify email, TikTok conversion ads, Pinterest conversion ads, and a lot more.

Email Marketing with Shopify

Email marketing is an incredibly effective way to acquire customers. Let’s use the Shopify email app to set up your email marketing. First, choose a template that fits your needs. From here, you can edit the email template to reflect your information. Upload photos and videos, and even add cool add-ons such as countdowns or express checkout. And when you’re ready, send a test email and review it to make sure that the email is up to your standards.

Automating Your Marketing Efforts

Now, let’s talk about automations. As Jenny Ramdy, former CEO of IBM, said, “One of the greatest benefits of automation is that it can free people from mundane tasks so they can focus on innovation.” Shopify has marketing automation tools to free up your time and make your processes a lot more efficient. We don’t want to trade our jobs for a business that makes us work double time.

Here’s how to create and manage marketing automations in Shopify. Go to automations under the marketing section in your Shopify admin. To create an automation from a template, click View Templates. Now, click the automation that you want to use and click Use Template. Review and edit the workflow so it has your messaging and branding.

Mastering Shopify’s Marketing Tools

The Ultimate Shopify Marketing Process

Here is the ultimate Shopify marketing process. Capture leads with Shopify forms. Once customers sign up through one of your forms, send email campaigns that convert with Shopify email. You can then automate the perfect message to the right people at the right time using Shopify segmentation. That’s found under the customer section. I’m going to show you more on that in the customer management section of this video.

These tools drastically simplify this process for you, and you can manage it all right on your Shopify dashboard. Shopify forms, Shopify segments, and Shopify automations are all included in your plan and are free to use. Shopify email allows you to send up to 10,000 emails for free every month. After that, it’s only a dollar for 000 emails. Not bad.

You also have dozens of email marketing apps to choose from on the Shopify app store. Some great marketing options are Mailchimp, Clavio, Omnisend, and Privy. However, these apps will have their prices and plans on top of Shopify.

Quiz Time!

Okay, quiz moment. Where can you find Shopify automations? A under marketing or B under customers? If you answered A, then you are correct.

Running Facebook, Instagram, and Google Ads

Now, let’s get you set up for running ads on Facebook, Instagram, and Google right from your Shopify store.

Facebook & Instagram Ads

First, download the Facebook and Instagram apps. To run ads, you need to have a published Facebook page, and you need to have an admin role on that page. To get started, connect your Facebook account and choose which pages you want to connect. You can also connect your Instagram account here.

Then, you can choose your data sharing preferences. You can choose conservative, enhanced, or maximum. This will give you some of your customers’ data. It explains it in more detail below. Now, connect or create a pixel. Then, read and agree to the terms and conditions, and make sure that you have or create a business portfolio in Meta Business Manager.

To set up a Facebook campaign, click Create campaign. Select the Facebook audience building ad and click setup.

Google Ads

Now, we can’t forget about Google Ads. To run Google Ads, first install the Google and YouTube apps from the Shopify app store. Then, connect your Google account. Review setup requirements and make any necessary changes.

To complete the setup, connect your Google Merchant Center. You can always make one if you don’t have it. Then check the online store requirements. Verify your business. Confirm your recommended store setup and agree to all the terms and conditions.

Now, to create a Google ad, click get started under advertise your products on Google Ads. You can see here that your products will need to get approved before you can get started. Lastly, link your Google account and your Google Analytics account. And now you can officially set up your campaign in your Google Merchant Center.

Shopify Audiences for Targeted Ads

Let’s talk about Shopify audiences. Shopify Audience is a tool that helps you find new customers by generating custom audiences for advertising platforms. It generates lists of customers likely to buy from your store. These lists are automatically uploaded into your advertising account, where you can launch targeted ads. This is incredibly helpful for targeting the right people.

To set up Shopify audiences, go to the app store and look up Shopify Audience. Open the app and agree to the terms and conditions. Now, turn on data sharing. Next, you can connect to any eligible ad platform where you have ad campaigns and export audiences to the platform.

So, to generate an audience, click the meta tab, for example, and then just click generate audiences. You can now add the audience to your existing meta campaigns or add it to new ones. You can do this for any other ad account you have for TikTok, Google, Snapchat, or even Pinterest.

Optimizing Your Store for SEO

That was a lot of good information on ads, but now let’s move on to SEO. Remember, SEO stands for search engine optimization.

When you add a product, Shopify Magic automatically shows you how your titles and descriptions will show up for SEO. So, try to make your titles and descriptions something that your target audience would look up. And then you can use Google Trends to see what keywords are trending right now in your industry.

Add those keywords into your Shopify store titles, descriptions, and image alt text. To set the image alt text, go to products in your Shopify admin. Click the product image that you want to edit, then click edit alt text. Next, enter the descriptive keywords and click save. You can do the same thing for collections or blog post photos.

Search engines show the websites that appear to be the most relevant, so you want to make your website as relevant as possible. The easiest way to optimize SEO is through your content. Content is key. Okay.

Also, you want to make sure that your URLs and file names match your content as well. Edit the title tags, web pages, products, and collections to reflect those popular and relevant keywords, and you’re now set for SEO. You can always build on this, but these are the fundamentals.

Submitting Your Sitemap to Search Engines

Next, you will want to submit your site map to search engines like Google and Bing. A site map is like a road map of your website and all of its content. This will allow search engines like Google to read or crawl your website. It will also tell search engines which of your pages is most relevant, and it’s going to help you monitor your website data.

Before we start, you will need to turn off your website password to connect your sitemap to the Google console.

Finding Your Shopify Sitemap

So, how can you find your Shopify sitemap? Your Shopify sitemap should be something like yourstore.com/sitemap.xml. You can confirm your sitemap by typing in your domain name/sitemap.xml XML at the end. And this page should pop up to confirm that it’s correct.

Submitting to Google Search Console

Now go over to Google Console and make an account. Click add property in the URL section and paste your domain name. You will then be brought to this page. Click on sitemaps on the left menu bar and paste your website sitemap into the Add New Sitemap section. It should be your domain/sitemap.xml. Now click submit.

But guys, make sure you see success here. If it says couldn’t fetch, just refresh the page, and it should be good to go. Your site map is now set up.

Conclusion

You now officially know how to effectively utilize Shopify’s marketing tools and SEO to attract new customers to your store.

Guys, thank you so much for watching. We know your time is the most valuable commodity that you have. So, we feel very honored to be a part of your business journey.

Freelancer’s Guide: Upwork vs. Fiverr – Which One Fits You Best?

Introduction: Comparing Upwork and Fiverr

So if you’re starting as a freelancer and you like to know which one is the best tool to add projects for example working as an upwork or for working here into fiva so I’m going to show you just a free way of how we can actually do this a free comparation between both of them and see which one fits for us the best and one of the most easiest way is to look out for both applications as is you were as you were as an actual buyer so directly here into a work I’m going to look in with an actual Google account for example and into fiber I’m going to do exactly the same thing we are directly here uh adding as an actual uh viyer.

Exploring Fiverr as a Buyer

So if I am a viyer usually what I’m going to be doing here is to find uh for example let’s say uh people who can’t help me for a specific project so for example you go for fivr and I want to hyp with a video editing right so I have a lot of competition here there’s a lot of people who offers a lot of the video editing right so you can see here are all the videos here are all the reviews and basically I can now look out for profession skills and expertise service option freelance details budgeting so even I can change this for an actual service so and I can see something more specific so here inside the Fiverr say for example that we have something much more uh let’s say organized because we can look out for graphics we can look from programming digital marketing video gr and music video businesses and so much more and here to the upper side you can see the offers and here the search bar of course.

Exploring Upwork as a Buyer

Now if I do exactly the same thing but into upw work I must have an actual account here to get started usually here so I did not have an upwork account uh to get started of course a look out for jobs I’m going to open a t let’s go for a private mode window let’s go for upwork and here into upwork

let’s open this TFT and here let’s say for searched let’s go for video editor now here I have something uh a little bit just related uh inside for example uh like the fivr for example I have to find the talent I have post the jft browse and bu projects get advice from an industry expert find work y up work enterpris we have once again here to the upper side the more uh let’s say filterings and here are Talent batches and the filter is of looking for somebody who is willing to work with you for a specific amount our SP English stable all the languages and so more.

Understanding Both Platforms

So take your time to let’s say understand both applications to see what they offer and how the valer should be looking at your work so in my case I believe that op work looks a little bit more professional than the actual fiber because fiber looks for more freelance jobs I mean both are for freelance jobs but here it looks so much more professional the actual up work so I take that in mind as the time to sign up I mean both are totally for free so you can try to sign up and start to let’s say add your own projects and to see which one can be helping you to get started first.

Posting Your First Job: Fiverr vs. Upwork

Now the second thing to understand which one is better is to post your first job all your first projects for example here into five we going to go directly to switch it into sell because I am now a a selling uh selling uh stuff here because I am now a freelance I’m going to focus here into my business I’m going to go for my G and I’m going to start to check out a little bit more about my gex so for example here I have this gig uh basically this gig is for example of how it actually looks my jobs I mean my freelancing jobs here’s a gig title I have the option to add a category the service Ty there’s a gig made it datas you have the sear tag that can helping us to let’s say associate terms with enter here with your one looking for there’s some negative words we can save this uh there’s the pricing there’s the description requirements and the gallery.

Now doing this from the other side which in this case is the up work I’m going to go here and look out for my freelancer account something that is going to be amazing rather than using the Fiverr is that we currently have an actual uh account and here we have a profile website so we do have a propile website directly here into Fiverr to analyze that we can always go into my business look out my profile and check it out

how it looks we have the about the portfolio the inro video education certifications fi basically that would be actually it and back directly here in the upwork we have your account we have the public view I’m going to click on it here’s the hours per week the languages the employment history the creativity here uh the raise and the duration so I believe that maybe fiber is uh a little bit much more cretive when it comes to uh let’s say introduced you into the freelancer uh language.

Finding Work: Active vs. Passive Approach

So back here directly here in the upwork going to click in it and let’s say for example we’re going to be trying to add a specific work so let’s go here for find work now we are not allowed to add our own let’s say proposals or or in this case as the firewor would tell it uh GED so what we can do is to look for in a specific jobs for example uh let’s go for search your job and let’s say that I’m going to be creating some video editor or Tik to video edor for example and here as you can see have the payment verified uh hours rated create viral style content looking for scale be error here are the proposal from the United States um and here into fivr let’s say we are not reaching them they are reaching us.

Key Comparison: Fiverr’s Passive Reach vs. Upwork’s Active Proposals

So I believe that one of the best uh comparision about this both applications is that here in the Fiverr you have the options to just let’s say showcase your work and let your customers come through you but the if you want a more faster solution the most fast and easy way to get a job is to use upward because there are people who actually looking for in a specific gig and to get started usually like from the very first day so you can just reach to them and let’s say for example tell them why you are accurate and let’s say you are the right decision to get started like today and you just needed to tell them what is your job type what is your price what is your experience level and you can now start to work like right away but here into fiber you just have to wait till somebody hires you.

Upwork vs. Fiverr

Pricing and Membership Benefits

And the last thing is the actual prices and to fiber there is an actual new section which is the level overview the level overview can be helping you with the progress structs where you can have the score rating response earnings unique clients um and of course we have a Pro Ban as a freelancer the pro as the fire Pro of course you might be having more benefits for example There’s an actual bat you have premium clients you can get paid by hour you have an exclusive Community there’s an onboarding support and customer protection once again you’re still are going to be waiting till somebody hires you.

So back here into upward if you’re looking for something related for a plan we do have a new plan let’s go for the plus the plus can be helping you to add connections access to the AI uh we have 20% of Microsoft 365 we have a compet BS for any job there’s Ser service fee the customization of the profile and this something we important the connects total per month we can add a specific connects we can try to look how from reach for a specific GS and jobs here but if you have a free account here from upwork you’re not going to be able to look out for a lot of jobs and to let’s say send uh in this case an application because to send an application you must need to have a few connections and if you don’t have enough connections you’re not going to be able to submit your proposal something that is not going to be so great rather than fiber.

Final Verdict: Which One Should You Choose?

So if upwork didn’t have this connected elements I believe that this could be better than the fiber but now speaking about the connections this is really con of the upwork and it really don’t gives you enough opportunity to reach more customers so at the end of the day I believe the best solution to get started is the fiber because fiber has absolutely everything to get started and you have the progress tracker the more jobs you have the more chances you get um hire and to get more really great clients so take that in mind you can try both applications once again totally for free and you can see which one it helps you to boost your career as a freelancer or as a Sol entrepreneur.

Conclusion

So without that being said we can now to the very end of the video guys so don’t forget to like share and subscribe to the channel once again you can check them out totally for free you have the linked down below description for both applications see which one fits for you the best thank you once again and hopefully we can see you next time.

My Facebook Marketplace Selling Secrets: How to Sell Faster & Smarter

0

The Banana Holder That Started It All

I was browsing Facebook Marketplace the other day, and I saw this listing for a banana holder and I looked at it for a few seconds and thought maybe it’s time for another Facebook Marketplace video. Facebook Marketplace is an ever-changing place—it’s full of scammers, but it is also full of genuine people who are trying to sell their quality items. This platform truly has the full spectrum, and sometimes you just don’t know what to expect.

Why You Should Trust My Tips

I am by no means an expert on Facebook Marketplace; however, I have sold every single listing that I have put on the platform. Items have ranged from my used jacket to my dad’s snowblower to even some old used Crocs. Even my old iPhone—I’ve listed such a wide variety of items, probably some of the largest variety of items on the platform, so I have just a little bit of knowledge in all of it.

Welcome to the Riley Reform Channel!

What is going on, everyone? This is Riley with the Riley Reform Channel, and today we’re diving deep into the art of selling items faster on Facebook Marketplace. Whether you’re a seasoned seller or you’re just starting, stick around for some game-changing insights. Now, let’s get started.

The #1 Rule: Communication Is Key

Over the last few years of Facebook listings, one of the biggest things that I have come to expect is solid communication between both parties. If you’re selling something, you better be responsive to all of the people who message you, not just quick responses, but also thoughtful responses. This is not the area to be short. Someone who is hard to get a hold of or gives short, not very thoughtful responses is a big turnoff for me.

If I am selling to someone, I may pick the person with just the better communication skills, and it may be a big turnoff for a buyer if you do not take the time for thoughtful responses. We all know the person to whom you type an entire essay to and all you receive back is a simple “yes” or “yeah” in response. I tend to kind of roll my eyes at this and think twice about whether I want to sell to that person.

A Real-World Example of Better Communication

A great example of when you’re selling to somebody is when somebody will ask, “Hey Riley, is this item still available?” A common response to that would likely be “yes” or “yeah.” But how about this response? What if your response was:

“Yes, Susan, this item is still available. Please let me know if you need any additional info or pictures about this.”

I don’t know if some people realize what sort of difference this change makes in the goal to ultimately sell your product. While both responses are “yes,” one acts like you are annoyed with somebody asking you if this is still available, and the other is an inviting response and encourages them to respond. So this is something you should try next time you sell.

Timeliness Matters Too

Communication is a critical aspect of successfully selling a product. Timeliness plays hand in hand with communication. When a potential buyer reaches out, aim to respond promptly. The online Marketplace is a very fast-paced area, and a delayed response might lead to losing out on a potential sale.

Often, when I’m searching for a product, I will make my search and message maybe the top five people that pop up in my area. If someone responds first, you’re more likely to go with that person. As a seller, you want to check your messages regularly, set up notifications, and do whatever it takes to be on top of those inquiries.

Politeness Goes a Long Way

And finally, my last tip for communication would be that just general politeness goes a long way in online transactions. It may sound cringy, but remember—you’re not just selling an item, you’re also trying to build up a brand and sort of a reputation online. If you’re polite and just respectful to a potential buyer, this can lead to positive reviews.

And so far, I’m up to 18. I just got my last perfect five-star rating while I was recording this video.

The Power of Reviews (And How to Get More)

One of the first things to do—and I suspect many of you do this now when buying on Facebook Marketplace—is to check the seller’s reviews. If I see anything less than a four-star rating, I instantly think something is wrong, and I am turned off by that seller. So, try to keep those reviews up.

Whenever I finish a successful transaction, there is an option to request a rating from the buyer. People generally forget to leave reviews without explicitly being notified in their messages, so this is a very useful feature. And I’m going to show you how to do this right now.

How to Request a Rating

Open the Facebook app and then go to the Marketplace tab. So you’re going to go to “Sell,” and then at the top, you want to click “Chats to Answer.” Right now, I don’t have any listings available, so it says zero, but that doesn’t matter. So you click “Chats to Answer,” and then you will see the very top thing is when I just sold my winter jacket. So I will click this.

I have already requested a rating, but to do this, all you would do is at the top, where there is “More Options.” So you click “More Options,” and then instead of “Report Buyer,” there is an option to “Request Rating.” I clicked that, it requested a rating a few days ago, and I already saw that he just gave me a five-star rating. So that is how I’m able to maintain five-star ratings on Facebook.

Timing & Frequency: When to List for Maximum Sales

The next big topic of discussion for selling items on Facebook Marketplace is timing and frequency. It’s not just about what you’re selling, but it is also when you are selling that item.

Seasonality Matters

So, firstly, understanding the optimal times to post your listing is crucial. And no, I’m not talking about the time of day. I found that time of day doesn’t make a significant difference in posting an item because I rarely get responses right away after posting something.

I’m more talking about the time of year that you choose to post your product. Like, do you think that posting a snowblower in the middle of July is going to get a lot of traction? Uh, I don’t know if anyone shops for snowblowers in the middle of the summer.

Some items have the concept of seasonality. If you did not have good luck selling that snowblower in the middle of July, that doesn’t mean you should give up. List it again when it gets closer to the season when people are actively going to be thinking about that item.

Holidays = Higher Sales

This concept can also be applied to the holidays. I feel like everything can be better sold around the holiday season, so definitely the last quarter of the year, when people are trying to get good deals for the holidays and save some money.

When I recently sold my iPhone, I was told that they were looking for a Christmas gift for a friend, which is a great Christmas gift. Hence, good time to list the product in October when the holidays will soon be upon us. If you’re looking to sell something that you think would be just overall a great gift, do not ignore this time of the year.

Keeping Your Listings Fresh

So now I’m going to talk about the concept of frequency. Facebook’s algorithm tends to favor more up-to-date content, so if your listing has been hanging around for a while without much action and you start to wonder if you’re ever going to be able to sell the same thing, well, it might start slipping down the search results.

There are a few things you can do—like regularly updating the price, you can renew the listing, and maybe even adding newer pictures may certainly help your old listing that has been hanging around for a while.

Pricing Strategically

Price is a hard one because everybody wants to get the most money for the item they sell, but I can assure you, if you’re not getting any messages and an item has been around for a long time, you will need to take a look at your pricing.

A good way to do this is to compare your listing to other similar ones. If you’re charging more, well, it’s no wonder you’re not getting any action. Price is something that you cannot be stubborn with—some money in the end is better than no money.

How to Renew a Listing

Updating your listings in this fashion and also making sure you renew your listing not only keeps the listing visible but also signals to the Facebook algorithm that your item is still relevant.

Facebook Marketplace is not as easy as listing something and then forgetting you ever listed it. You need to remain active. So now I’m going to show how to renew a Facebook Marketplace listing.

After we clicked “Sell,” there was an option for “Listings to Renew.” So this pushes it back up into the Facebook algorithm. So every time you see this option available, you’re going to want to renew it.

To renew—I don’t have any—all this menu is is it shows you a list of everything that you can renew, you check it, and then click “Renew,” and then it’s as simple as that.

Leveraging Facebook Groups for More Sales

The next area for things I wanted to discuss is community engagement on the platform. Your success isn’t just about the items that you sell, but it’s also about the relationships that you can build in the Facebook community.

And to do this, if you’re not familiar with the concept of groups on Facebook, it’s definitely about time you become familiar because, in the end, they can help you make more money.

Finding the Right Groups

So first off, you’ll want to explore and join local groups related to your niche or the items you’re selling. These groups are honestly goldmines for potential buyers who are already interested in what you have to offer. Participate actively and don’t hesitate to showcase your listings while you are in these groups.

How to Join a Selling Group

So I will showcase how to join a relevant group on Facebook. The last thing I wanted to show in the Facebook app was how to join a group because joining groups can drive community engagement.

So to do this, you’re going to open up Facebook, go to the homepage, and then click “Search.” So I happen to live in Stevens Point, so I’m going to just search “Stevens Point,” and then at the top, there are different criteria to search, and you’ll see—actually, this is when I posted my last iPhone—so I’ll go to “Groups” at the top.

So, click “Groups,” and then this shows you groups that you can join. So, a lot of times, there are groups specific to the city that you live in, but specific to selling items. So I’m going to scroll through this list until I find something related to buying or selling.

This is a perfect one—it’s a private group for 23,000 members. 23,000 people are a lot of people, and it’s not just people in the main town, it’s probably also people in the surrounding area. So it is as simple as just clicking it, reading the description, and making sure that you’re following the guidelines, which, for this one, I believe exist to just post what you want to sell.

This sounds great, so I’m going to click “Join,” and then after I click join, there is now a pending approval request that goes out to the admin. It looks like there were a few questions that came up—it doesn’t look like I have to answer these, but I might fill them out just in case. And that’s it—my request is now pending.

So hopefully, I can join the “Stuff for Sale in Stevens Point, Wisconsin” group and sell even more listings in the future.

Why Groups Boost Your Sales

After you successfully join a Facebook group (as I just showed), when listing an item on Facebook Marketplace, it will ask if you want to post this Marketplace listing in that group. Now, this is key because it will create an additional post with no extra effort on your end, except simply clicking the check box.

A post on Facebook is important because this allows fellow members in the group to like, comment, and share with other people on the platform.

I have personally received a comment from one of my last listings where I listed my old iPhone. I listed my old iPhone in a group, somebody commented on it, and tagged another person to check it out because they thought that person may be interested in the iPhone.

Now, this is great for a few reasons:

  1. It drives engagement to your profile, which Facebook just loves. If there is engagement, it will recommend it to more people and put your listing out there more frequently.
  2. Another reason is that because the person tagged another person, they’re almost 100% likely to see it because every time you open Facebook, you have the badge icons in the notification section in the bottom right, and I don’t know anybody who can ignore that.

If that person is tagged, they’re going to click and see that they were tagged in a product.

Posts in groups are great because you know not only have Facebook pushing your items out to people (which, since Facebook just collects so much data, it does a rreat job at recommending items), but then you also have the community sharing it to people who they think may be interested in your product. And that can lead to the sale of your product.

So really, it’s a win-win all around for everybody.

Stay Active in Groups

Once you are in the group, make sure to use the same communication skills that I mentioned before in this video. Respond promptly to comments and different inquiries within the groups. Being an active and helpful member can turn your potential group members into loyal customers.

Plus, the more engaged you are, the more likely your listings will be available and visible to others in the group.

Final Thoughts & Call to Action

And that wraps up my comprehensive guide on how to sell items faster on Facebook Marketplace. We’ve covered everything from optimizing your listings to mastering your communication skills and understanding the nuances of timing and frequency.

We also showed how to utilize Facebook Marketplace features and the power of community engagement. I hope you found these insights valuable and actionable for your selling journey.

If you enjoyed this video and found the tips helpful, don’t forget to give it a thumbs up and share it with your fellow sellers. If you haven’t already, hit that subscribe button and ring the notification bell so you never miss out on any future guides and tips that I may upload to my channel.

All in all, Facebook Marketplace has kind of become my thing, so you know more videos like this will be available in the future.

Remember—selling on Facebook Marketplace is not just about the transactions, but it’s also about building those relationships. So with that, I hope you apply all these strategies, stay engaged, and watch your sales soar higher than they ever have before.

The engagement is usually pretty high on these types of videos, so if you have any questions or want to share your own experiences, feel free to comment below. I love hearing from eeverybody whocomments.

But thank you guys so much for watching—this has been Riley with the Riley Reform Channel. Hope to see you in the next video, and I hope your day is as pleasant as you are!


How to Launch a Successful SaaS Company in 2025

0

The SaaS industry is booming with revenues projected to hit over $200 billion by 2025. The future is in businesses with recurring revenue and scalable potential—AKA SaaS companies.

What is SaaS?

SaaS stands for Software as a Service. It’s a cloud-based model in which users access software over the Internet without needing to download it.

The best part about creating a SaaS company is that you can build the product once and sell it forever. This is an attractive model for entrepreneurs, and it can be run remotely (yes, even from the Bahamas if you want to).

I know I have way too many subscriptions to SaaS companies because signing up is so easy that I almost forget I did.

By the end of this post, you’ll know the exact steps to launch your own SaaS company and create a recurring and consistent income stream. I’ll not only show you how to build a business but also how to validate it, market it, and scale it.


Why Start a SaaS Business?

SaaS companies have a unique advantage in the marketplace:

  • Recurring revenue
  • Scalability
  • Global reach

But how do you make sure people are willing to spend money on your product?

Step 1: Market Research

The most important part of any business is ensuring there’s a market for it—meaning people are already spending money on similar solutions.

Before anything else, answer these two critical questions:

  1. What problem is your SaaS product solving?
  2. Who are you solving it for?

Use Google to research:

  • Your competition
  • Market size
  • Industry trends (growth, top spenders, emerging trends)

A great tool for this is Frederick AI.

Step 2: Build a Prototype (Before Spending Thousands)

Instead of dumping money into development before validating demand, build a prototype.

An easy way to do this is by creating a wireframe (a visual blueprint of your software). You can:

  • Sketch it with pen and paper
  • Use tools like Balsamiq or Figma

This helps developers understand your vision before coding begins.

Step 3: Validate Your Idea (Before Building the Full Product)

This step will save you from wasting money. The moment someone pays you, you officially have a business.

Method 1: Start a Waitlist

Get users to sign up before building the app. Incentivize sharing with:

  • Points
  • Discounts

Tools to create a waitlist:

  • Waitlist
  • Viral Loops
  • Shopify Forms
  • Google Forms

Method 2: Early Adopter Program

Offer participants a discounted license in exchange for early access. Benefits could include:

  • Verified status on the platform
  • Involvement in feature creation

Daniel Priestley (who built a $10M company by age 21) says validation is the most crucial step before investing heavily.

Step 4: Build an MVP (Minimum Viable Product)

An MVP is a bare-bones version of your product with just enough features to demonstrate value.

Tools to build an MVP:

  • Figma
  • Bubble
  • Shopify
  • Glide

Examples of Successful MVPs:

  • Buffer started with a landing page explaining social media scheduling.
  • Zapier began as a manual process (the founder connected apps by hand!).
  • Airbnb tested demand by listing their apartment.

Step 5: Pricing Your SaaS Product

Before setting prices, research competitors in your space. Also, factor in:

  • Monthly costs
  • Break-even timeline

Popular SaaS Pricing Models:

  1. Subscription-Based (Netflix, Shopify, Spotify)
  2. Freemium (CapCut, Dropbox)
  3. Usage-Based (Stripe)
  4. Flat-Rate (Notion, Adobe Express)
  5. Per-User Pricing (Slack, Zoom)

“A great pricing strategy doesn’t just maximize revenue—it maximizes your customers’ success.” – Patrick Campbell (ProfitWell)

Step 6: Marketing & Customer Acquisition

How will customers find you? Marketing is your best friend.

Top Strategies:

✅ Partner with influencers & thought leaders (give free access in exchange for promotion)
✅ Affiliate marketing (pay influencers per referral)
✅ Run paid ads (Facebook, TikTok, Google)
✅ Offer free trials (let users test before buying)
✅ Create educational content (build trust & community)
✅ Showcase reviews & success stories (social proof sells)
✅ List on the Shopify App Store (if serving businesses)

Tools to find influencers:

  • LinkedIn Sales Navigator
  • Apollo.io
  • Shopify Collabs

Step 7: Building Your SaaS Team

You’ll need:

  • Developers (to build the software)
  • UI/UX Designers (for interface)
  • DevOps Engineers (optional)
  • Customer Support

Where to Hire Talent:

  • Toptal (top 3% talent)
  • Wellfound (for startups)
  • Gun.io (software specialists)
  • You don’t need a big team to start—outsource development if needed.

No-Code Alternatives:

  • Bubble
  • Glide
  • Adalo

(Downside: You don’t fully own the software.)

Helpful SaaS Tools:

  • Firebase (app development)
  • Maxio (billing)
  • FullStory (behavioral analytics)

Step 8: Keeping Customers Happy

  • Provide ongoing support
  • Update software regularly
  • Fix bugs quickly
  • Monitor feedback

Goal: Reduce churn & increase retention.

Step 9: Scaling Your SaaS Business

Use the 80/20 Rule:

  • 80% of results come from 20% of efforts
  • Double down on what works

Scaling Strategies:

  • Refine target customers & retarget them
  • Upsell (solve additional problems)
  • Expand to new markets
  • Automate processes
  • Raise funding (if needed)

Common SaaS Challenges (& How to Overcome Them)

  1. High Churn Rate (aim for <5%)
    • Survey customers who leave
    • Improve weak areas
  2. Competition
    • Stay ahead with better features
    • Listen to customer feedback

Future of SaaS Trends

  • AI Integration
  • Micro-SaaS (smaller, niche products)
  • White-Label SaaS (rebrand existing software)
  • Market Consolidation (big companies buying smaller ones)

Final Thoughts

“Being an entrepreneur means doing the known work for the unknown outcome.”

Success comes from taking action quickly. Don’t let ideas sit in your head—build, validate, and launch.


6 Common YouTube Ad Mistakes to Avoid 2025

0
 

You’re running YouTube ads, and they’re not working. Or maybe you’re thinking of running YouTube ads, but before you start dumping in your hard-earned cash, you want to make sure you know what you’re doing reasonably well.

In this video, we’re going to talk about the top six things you want to avoid when running YouTube ads. My name is Michelle B, you’re watching Learn with Shopify, and let’s get into it!

Why YouTube Ads Are Worth It

There are several advantages to advertising on YouTube, making it a powerful tool whether you’re a one-person show or running a large business. So, what benefits can you expect when running YouTube ads?

You’ll be happy to know that a good conversion rate for an e-commerce page (when looking at Google Analytics) is often 1-3%. For a YouTube ad campaign, a good conversion rate is usually over 12% (according to LinkedIn). This speaks volumes about the power of this advertising platform.

Massive Reach & Targeted Advertising

YouTube has a huge audience, with billions of users logging on every month. It’s a great platform to get your business in front of a large audience—but not just any audience. You can strategically choose who you advertise to with targeted advertising, right down to:

  • Specific demographics
  • Interests
  • Viewing history
  • Types of videos they typically watch

Highly Engaged Audience

Unlike other platforms where users might be multitasking or mindlessly scrolling, YouTube’s audience is dialed in. They’re often on the couch with their full attention on the screen, increasing the chances of your ad being seen and remembered.

6 YouTube Ad Mistakes to Avoid (Ranked by Spiciness 🌶️)

Some of you liked the ranking system in my last video, where we went from easiest to hardest tips (ranked by hot peppers). The harder the tip, the higher the heat. So, we’re doing that again!

1. Not Setting Up Conversion Tracking Properly (🌶️ Red Bell Pepper – No Spice)

When setting up your YouTube ads, you must ensure your conversion tracking is set up correctly. Imagine setting this up wrong and not having accurate data on your ad performance and ROI—yikes!

How to Fix It:

  • Use Google Tag Manager tags (conversion tracking pixels log desired actions).
  • Set up conversion actions so Google knows what to track (purchases, sign-ups, etc.).
  • Test your tracking using Google Tag Assistant or simulate conversions to ensure data flows correctly.

Fun fact: Did you know red, yellow, and orange bell peppers taste the same? I closed my eyes, and they were identical. Mind. Blown.

2. Not Giving Your Ads Enough Time to Gather Data (🌶️ Shishito Pepper – 1 in 10 is Spicy)

If you run your ads for a short time and then panic-turn them off, YouTube can’t optimize effectively. Without enough data, the algorithm doesn’t know what works.

How to Fix It:

  • Start with broad targeting (let the algorithm gather data).
  • Once you have data, refine targeting based on demographics, interests, and behaviors.
  • Be patient—don’t expect immediate results. It takes time for YouTube to learn what works.

Is anyone feeling the heat yet?

3. Having a Weak Landing Page (🌶️ Serrano Pepper – Medium Heat)

A killer ad with a weak landing page = lost sales. Potential customers will bounce if your page looks untrustworthy or isn’t mobile-optimized.

How to Fix It:

  • Highlight benefits, not just features (e.g., “This water bottle fits in your cup holder—no spills!”).
  • Use high-quality videos, catchy headlines, and short text (no massive paragraphs!).
  • Add testimonials & reviews for credibility.

4. Ignoring Your Funnel Drop-Off Points (🌶️ Chocolate Habanero – Spicy!)

This one’s tricky because you need to analyze data and adjust messaging based on where people leave.

Example:

  • Michael runs fitness ads but sees viewers click away early.
  • He realizes the moves look too hard for beginners, so he adjusts the ad to address beginner struggles.
  • Result? Fewer drop-offs and more completed views.

Key Takeaway: Test one change at a time to see what works.


5. Poor Ad Creative (🌶️ Carolina Reaper – Extreme Heat)

If your ad isn’t engaging, your campaign will flop.

How to Fix It:

  • Follow a 5-part ad structure: Hook → Promise → CTA → Proof → CTA again.
  • Check video length & drop-off points (where do people leave?).
  • Test different variations (headlines, power words like “challenge” or “transformation”).

6. Pausing Campaigns Too Soon (🌶️ Bonus Tip – Don’t Fear Scaling!)

If your campaign is running out of budget but performing well, don’t pause it! YouTube may recommend increasing your budget to scale success.

Final Thoughts

Running YouTube ads takes testing, patience, and optimization. Avoid these mistakes, and you’ll be on your way to better results.

Want to Sell Online? Try Shopify!

If you’re running ads but don’t have an online store yet, consider Shopify. It’s an easy way to sell products worldwide. There’s a free trial in the description—check it out!

Life Update: Pickleball & Free Lessons

The other day, I played pickleball for 2 hours and got paired with a retired tennis coach. At first, I was annoyed (feminist mode activated), but then I leaned in—and got a free lesson! Two hours later, I was using my core like a pro.


The Ultimate Guide to Pinterest Affiliate Marketing for Beginners (7-Step System)

0


Last month, I made over $5,000 with Pinterest affiliate marketing—and today, I’m sharing my exact strategy so you can do the same!

If you’re new here, welcome! My Pinterest account drives 70k+ monthly visitors to my website for free. In this guide, I’ll walk you through my 7-step system to start earning passive income with affiliate marketing on Pinterest—even as a complete beginner.

Let’s dive in!

 Pinterest Affiliate Marketing

Why Pinterest Affiliate Marketing?

Before we get into the steps, let’s talk about why Pinterest is one of the best platforms for affiliate marketing:

✅ Free, long-term traffic – Unlike social media, Pinterest works like a search engine. Pins keep getting views for months (or even years).
✅ High buyer intent – People use Pinterest to discover products and ideas, making them more likely to click and buy.
✅ Low competition – Many bloggers focus on Instagram or TikTok, but Pinterest is still underrated for affiliate sales.

Now, let’s break down my proven 7-step system.

Step 1: Choose a Profitable Niche

Your niche determines how much money you can make. The top-performing niches on Pinterest are:

🏠 Home & Decor (e.g., furniture, kitchen gadgets)
👗 Fashion & Style (e.g., dresses, accessories)
🍲 Food & Recipes (e.g., kitchen tools, cookbooks)
💪 Health & Wellness (e.g., supplements, fitness gear)
💰 Side Hustles & Personal Finance (e.g., money-making tools)

Pro Tip: Pick a niche you’re interested in—it’ll make content creation much easier!

Step 2: Sign Up for Amazon Associates

Amazon Associates is the easiest affiliate program for beginners. Here’s how to join:

1️⃣ Go to Google → Search “Amazon Associates” → Click the first link.
2️⃣ Sign Up – Use an existing Amazon account or create a new one.
3️⃣ Enter Your Website – If you don’t have one yet, use your Pinterest profile link (I’ll show you how to set up a website next).
4️⃣ Set Your Store ID – Use your name or brand.
5️⃣ Complete Tax & Payment Info – Required before you can earn commissions.

⚠️ Important: You must make 3 sales within 180 days to stay approved. But don’t worry—I’ll show you how to get sales fast!

Step 3: Create an Affiliate Website (Fast & Easy)

Can you just link affiliate links directly on Pinterest? Technically, yes—but I don’t recommend it because:

❌ Pinterest limits affiliate links (they can suspend your account if you overdo it).
❌ Pins with blog links rank better than direct affiliate links.
❌ A blog lets you add multiple affiliate links per post, increasing earnings.

How to Set Up a Blog in 5 Minutes (For Free!)I recommend

Hosting er’s Managed WordPress hosting because:

✔ 1-click WordPress install (no tech skills needed)
✔ Free domain for 1 year
✔ Built-in AI tools (for fast content creation)
✔ Amazon affiliate plugin included (saves $$$)

Here’s how to get started:

  1. Click my Hostinger link → Choose the Business Plan (best for affiliate marketing).
  2. Use coupon code “ANASTASIA” for an extra 10% off.
  3. Install WordPress → Let AI generate your blog in seconds!

Now, let’s connect it to Amazon.

Step 4: Connect Your Blog to Amazon Associates

Inside hostinger’s dashboard:

  1. Go to Admin Panel → Click “Amazon Associates Integration.”
  2. Log in to Amazon Associates → Enter your tracking ID.
  3. Choose US store (best for commissions).

✅ Done! Now you can automatically add Amazon products to your blog posts.

Step 5: Use AI to Create Affiliate Content (10x Faster)

Hostinger’s AI Content Creator writes blog posts for you. Here’s how:

  1. Select “Blog Post” → Choose a friendly tone.
  2. Enter a topic (e.g., “15 Best Summer Dresses of 2024”).
  3. Click “Create” → AI generates SEO-optimized content + images!

Then, add Amazon affiliate links:

  • Use Hostinger’s Amazon plugin to insert product tables.
  • Compare multiple products (e.g., “Best Budget vs. Luxury Dresses”).

This would normally take hours—but with AI, it’s done in minutes!

Step 6: Drive Traffic with Pinterest (My Secret Strategy)

Now, let’s get free traffic from Pinterest:

How to Create High-Converting Pins

  1. Use Canva (free templates available).
  2. Add catchy text (e.g., “The Dress Everyone’s Wearing This Summer!”).
  3. Link to your blog post (not directly to Amazon).

Posting Strategy:

📌 Start with 3-5 pins/day → Scale to 20/day for maximum traffic.
📌 Use keywords in titles & descriptions.
📌 Join group boards for more reach.

Step 7: Automate Pins with AI (600+ Pins/Month on Autopilot)

Manually posting pins is way too slow. Instead, I use BlogToPin to automate everything:

🤖 AI creates 15-20 pins/day from my blog posts.
📅 Auto-schedules pins with 7-day gaps.
🔄 Auto-generates titles, descriptions & hashtags.

Now, I only spend 1 hour/month managing 600+ pins!

Final Thoughts: Start Earning Today!

Follow these 7 steps, and you’ll start seeing commissions roll in.

💡 Key Takeaways:
✅ Pick a profitable niche (Fashion, Home, Health, etc.).
✅ Join Amazon Associates (it’s free!).
✅ Build a blog with Hostinger (use AI for fast content).
✅ Drive traffic with Pinterest (automate pins for best results).